Table of Contents
Panel Recruitment

Panel Recruitment
Learn how to create a repeatable process for building a reliable group of research participants.
What is Panel Recruitment?
Panel recruitment is the process of collecting, qualifying, and managing participants who agree to take part in future studies. Each panel acts as a “research database” — participants sign up once, consent to ongoing contact, and share key details (like their role, company, and interests).
Why It Matters
Continuous Access to Qualified Participants: With an established panel, you can instantly recruit for new studies without repeating outreach or screening.
Stronger Relationships and Richer Insights: Panel members become familiar with your company and products over time, allowing for deeper, more context-rich conversations.
Streamlined Recruiting Operations: Panels centralize participant management — you can track consent, participation history, and profile updates in one place.
Improved Targeting and Segmentation: Because panelists’ data is stored in your candidate database, you can easily filter and segment them for specific personas, product areas, or demographics.
Scalable Research Across Teams: Panels make it easier for any team member (not just researchers) to recruit the right people, democratizing research across your organization while maintaining consistency and data integrity.
Common Use Cases
Use Case | Description |
Build a Dedicated Research Community | Create an ongoing panel of participants who have opted in for future studies, making it faster and easier to recruit qualified candidates for interviews, surveys, and usability tests. |
Centralize Participant Data | Collect and manage participant consent, demographics, and attributes in one place. Keep your candidate database organized and ready for targeted recruiting. |
Persona or Segment-Based Panels | Build specialized panels around specific user types (e.g., administrators, small business owners, or enterprise users) to streamline recruitment for targeted studies. |
Multi-Language or Regional Panels | Create separate signup flows for different languages or markets, ensuring inclusivity and accurate representation across diverse audiences. |
Automate Panel Growth | Use public signup links, embedded forms, or automated invitations to continuously grow your research panel while maintaining consent compliance. |
How to Set Up Panel Recruitment
Step 1: Create Your Study
- Navigate to Studies in the left-side menu.
- Click New study and select Panel Recruitment.
- Add core study details:
- Title and research goal
- Participation limit
- Participant segments (optional)
- Screener (optional)
- Consent form
- Custom study attributes
- Automatic slot release settings
- Participant language preferences
- Review your plan, then click Next.
Step 2: Set Up Your Screener (Optional)
- Add multiple-choice, text, or scale questions using the screener editor.
- Apply logic under Preferences or view full rules under All Logic.
- Review and click Next.
Step 3: Customize Your Signup Form
Use the built-in signup form creator to design questions and tailor the experience.
Add and configure questions.
- Add questions using supported formats (e.g., multiple choice, scale, text).
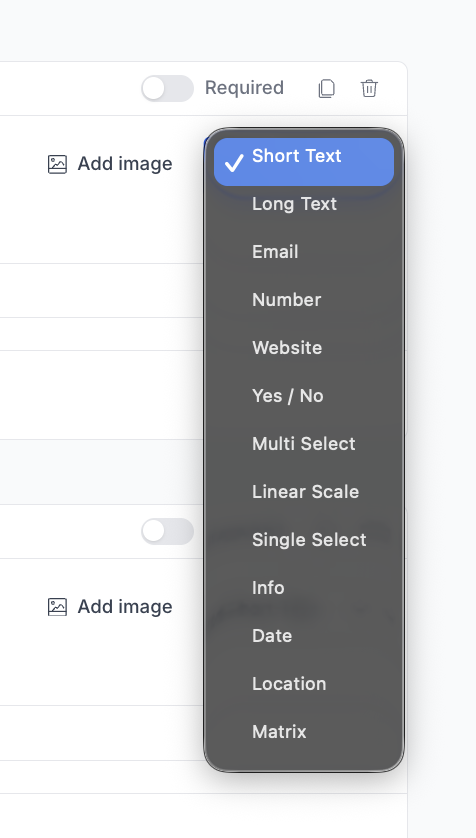
- Include helper text when you want to clarify instructions (optional).
- Mark questions as Required when a response is necessary to proceed.
Get help writing questions (optional)
- Use AI-assisted question generation to draft survey questions based on your research goal.
- Review, edit, add, or remove AI-generated questions at any time before publishing.
Enhance questions with media
- Add images to signup form questions to provide context or visual references.
- Supported file types include PNG, EPS, JPEG, and GIF (any size supported).
Customize logic and data mapping
- Use Attributes to map responses back to candidate profiles.
- Apply Skip Logic to control question paths based on participant responses.
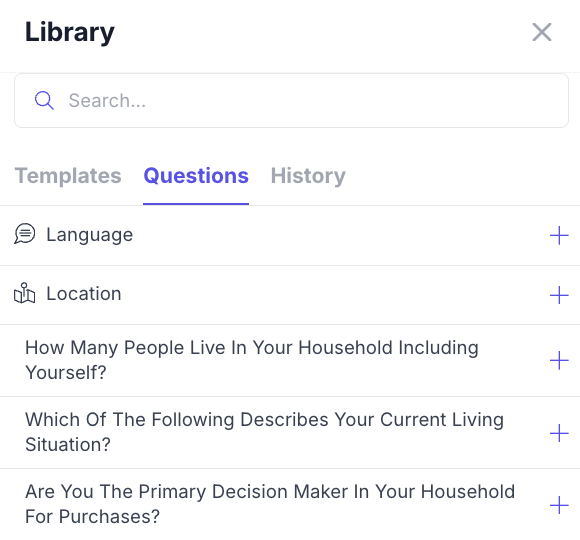
Reuse existing content
- Insert saved questions from the Question Library or Templates to speed up setup and maintain consistency.

Step 4: Review and Publish
Check all sections for accuracy. When ready, click Create to publish your study.
Managing Your Study After Publishing
Once your Panel Recruitment is live, there are several areas you may want to configure or monitor before and after inviting. These actions fall into three categories: Setup, Execution, and Results.
Setup
These areas help you fine‑tune your study before inviting participants.
Plan
Return to the Plan step anytime to adjust details such as participant limits, incentives, study attributes, or segments.
Signup Form
You can view your signup form and make any adjustments necessary.
Screener (if applicable)
You can edit screener questions or update logic if your qualification criteria change.
Emails
Customize participant-facing communications—including screener invitations, study invites, task reminders, and completion emails.
Pages
Update the Landing Page and Screener Disqualification Page to ensure participants receive the correct instructions and messaging.
Automations (Unmoderated Studies Only)
Enable automatic reminders to streamline participation:
- Send invitation reminders to candidates who have not responded within 24 hours.
- Send task reminders to participants who have not completed the test after 24 hours.
Notifications
Choose which email alerts you want to receive related to this study.
Execution
Once the study is live, these sections help you manage participants and monitor activity.
Participants
Add candidates, track their progress, and take actions such as inviting, removing, or reviewing participant status. This is where most post-publish activity takes place.
Stats
View email performance metrics such as delivery, opens, and clicks.
Screener Responses (if applicable)
Review individual or aggregate responses to your screener questions to determine eligibility.
Results
Use these areas for analysis and reporting.
Repository
View the artifacts related to this specific study.
Summary
The Summary view gives you both a high-level and participant-level view of your Signup Form results, making it easy to evaluate overall results.
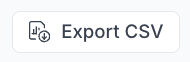
To export the results, use the Export CSV button towards the top right corner:
- Build once, reuse forever: Keep a large “default panel” for general use, then create smaller panels for specific target groups.
- Keep forms short: Long forms reduce completion rates. Focus on what matters most.
- Stay engaged: Use reminder automations to keep your panel warm and active.
- Recruit smarter: Use segments later to target the right mix of participants for each study.
Troubleshooting Panel Recruitment
Issue | What's Happening | How to Fix It |
Panel study not appearing | You may be viewing My Studies instead of All Studies | Switch to All Studies to see panel recruitment studies created by others |
The right consent form isn't being used | The correct consent form was not selected | Go to Plan → Consent and confirm the correct consent form has been selected |
Low signup rate | The signup form is too long or the value proposition is unclear | Shorten the form and refine the landing page messaging |
New signups not appearing as candidates | Sync may be delayed or form submission was incomplete | Refresh the Candidates page and confirm the participant completed the signup form |
Participant attributes not saving | Attributes were not mapped during form setup | Review Signup Form → Attributes and ensure responses are mapped correctly |
Participants not receiving emails | Email delivery may be blocked or automation is disabled | Check Automations, confirm email settings, and verify participant email addresses |
Still need help?
Reach out to us anytime in the app or email us at [email protected]!