Table of Contents
Reels

Reels
Learn what Reels are, how to create them, how to edit and organize them, and how to share them with your team.
Who this is for
This guide is for:
- Creators and Admins who want to compile highlights into shareable reels
- Observers who need to watch curated clips and share outcomes
What you’ll learn
By the end of this article, you’ll know how to:
- Create a Reel from scratch or from selected highlights
- Edit titles, descriptions, tags, and highlight order
- Add/remove highlights from a Reel
- Configure and copy share links (per-Reel and account defaults)
What are Reels?
Reels are curated, shareable collections of highlights that form a concise report of your research findings. They’re ideal for communicating insights to stakeholders without requiring them to scrub through entire interviews.
Before you start: Create highlights
To build a Reel, you’ll need highlights first.
- Open an interview/transcript you want to clip.
- Select the text segment you want to highlight.
- Click Save without tags (creates an untagged highlight) or apply a tag to create a tagged highlight.
For more depth on tagging and highlighting, see Tags & Highlights.
Create a Reel
You can create Reels in the Global Repository or in a Study’s Repository. The steps are the same.
Create a Reel without highlights preselected
- Click New → New reel (top right).
- Name your Reel (optional: add description and tags).
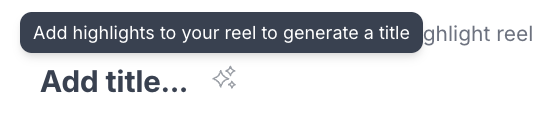
- If no title is added, the Reel is saved as “Untitled highlight reel.” Once you start adding highlights, you can use AI to create a title if desired by clicking on the stars icon.
- (Optional) Narrow highlights using Search for highlights and/or the Filter button.
- Select highlights:
- Check boxes next to specific highlights, or
- Check the box next to the count to select all, or
- Click the + on an individual highlight.
- Click + Add to reel (upper-right above the highlights list).
- Click Save highlight reel and allow processing time.
Create a Reel with highlights preselected
- Find highlights via scroll, search, or filters and check their boxes.
- Click Add to reel (top right).
- Choose Create new reel or add to an existing Reel.
- Name your Reel (optional: add description and tags).
- (Optional) Further filter via Search for highlights or Filter.
- Add highlights by checking boxes, selecting all, or clicking + per highlight.
- Click + Add to reel → Save highlight reel and allow processing.
Edit a Reel

Change the title
- Click the title in full view or slide-out → edit → click out or press Enter/Return to save.
Change the description
- Click Edit highlight reel (pencil) → update the description → Save highlight reel.
Add or remove tags
- Click Edit highlight reel (pencil) → use Find or create a tag to add study/global tags → Save highlight reel.
Rearrange highlight order
- Click Edit highlight reel (pencil) →
- Drag using the ⁝⁝ handle, or
- Move one position at a time using ﹀ / ︿ arrows →
- Save highlight reel and allow processing.
Add more highlights later
- Click Edit highlight reel (pencil).
- (Optional) Search/Filter for highlights.
- Select highlights via checkboxes, all, or +.
- Click + Add to reel → Save highlight reel and allow processing.
Remove highlights
- Click Edit highlight reel (pencil).
- Click ✕ on the highlight you want to remove.
- Save highlight reel and allow processing.
Share a Reel
Per‑Reel share settings
- Open the Reel and click Share (top right).
- Choose Public or Private. Changes save automatically.
- Click Copy link to share.
Account default Reel visibility (Admins)
- Go to Settings → Permissions.
- Under Default sharing settings of repository artifacts, choose:
- Public – Anyone with the link can view, or
- Restricted – Anyone on the account can edit
Copy a Reel link
- In the Reel: Click Share → set visibility → Copy link, or click the chain link icon.
- From Repository card: Click the chain link icon on the Reel card.
Troubleshooting Reels
Issue | What's Happening | How to Fix It |
Reel looks blank after saving | The Reel is still processing or highlights haven’t finished rendering. | Wait a few minutes, then refresh the page. If it remains blank, check that your highlights are accessible and contact Support if it persists. |
Can’t add highlights to a Reel | The highlight belongs to a study you don’t have access to, or you lack edit permissions. | Confirm your role (Creator or Admin) and verify the highlight comes from a study you can access. |
Highlights aren’t appearing in search | Filters or tags are too narrow, or search syntax doesn’t match. | Click Clear filters, then search again using a broader keyword or tag. |
Reorder changes not saving | You didn’t click Save highlight reel after rearranging, or the save didn’t complete. | After reordering, always click Save highlight reel and wait for the processing banner to disappear. |
Can’t rename or edit Reel details | You’re viewing in read-only mode or don’t have edit permissions. | Check if the Reel owner or Admin has restricted editing. Request edit access or duplicate the Reel if needed. |
New highlights aren’t showing when trying to add them | The highlight list hasn’t refreshed since creation. | Click Edit highlight reel → Refresh list, or reload the page to load the newest highlights. |
Drag-and-drop not working when reordering | The browser tab is lagging or too many highlights are loaded. | Collapse unused sections or reload the Reel in a new tab. Chrome or Edge browsers perform best for drag-and-drop. |
Share link not working | The Reel is set to Private, or your org’s default visibility is restricted. | Open the Reel → Share → Public → Copy link again. Admins can check Settings → Permissions → Default sharing. |
Recipients can’t view the shared Reel | The Reel is restricted to internal users. | Switch visibility to Public, or add recipients to your workspace for access. |
Reel title showing as “Untitled highlight reel” | No title was entered at creation and AI-generated title wasn’t used. | Open the Reel → click the title field → type your preferred name → press Enter/Return to save. |
Changes lost after editing | The save step was skipped, or processing didn’t complete. | Always click Save highlight reel before navigating away. Wait until the progress indicator confirms it’s saved. |
Duplicate Reels appearing | Reels were created multiple times during slow processing. | Check timestamps and delete duplicates once the correct version finishes processing. |
Still need help?
Reach out to us anytime in the app or email us at [email protected]!