Table of Contents
Snowflake Integration
 Updated
by Billy Dowell
Integrate Great Question and Snowflake
If you use Snowflake for your data storage and want that data pulled into your Great Question account, follow along with the steps below to get the ball rolling!
An integration with Snowflake makes managing your candidates easier and more streamlined. As well as ensuring a continuous flow of candidates into Great Question, updated candidate data, and more.
Need assistance setting up your Snowflake integration? Please reach out to [email protected]
id and email column.Create a Snowflake OAuth Integration
- To create a Snowflake OAuth integration, use the CREATE SECURITY INTEGRATION (Snowflake OAuth) command.
create or replace security integration <integration_name>
 type = oauth
 enabled = true
 oauth_client = custom
 oauth_client_type = 'PUBLIC'
 oauth_redirect_uri = 'https://greatquestion.co/users/auth/snowflake/callback'
 oauth_allow_non_tls_redirect_uri = true
 oauth_issue_refresh_tokens = true
 oauth_refresh_token_validity = 7776000;
ACCOUNTADMIN role) or a role with the global CREATE INTEGRATION privilege can execute this SQL command.- Run these two commands to extract the information necessary to connect Snowflake with Great Question:
- Run this to get the URL, which will look something like: 'https://<account>.<region>.snowflakecomputing.com'
desc integration <integration_name>;
- Run this to get the
OAUTH_CLIENT_IDandOAUTH_CLIENT_SECRET
select system$show_oauth_client_secrets(<integration_name>);
Connecting with Great Question and importing candidates
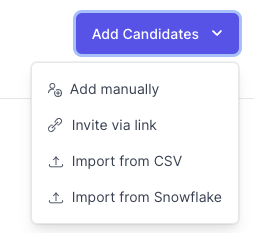
- After you have all the information from the steps above, you can go to User Menu > Account > Integrations within Great Question (or click here) and add the information to connect with Snowflake using your credentials.

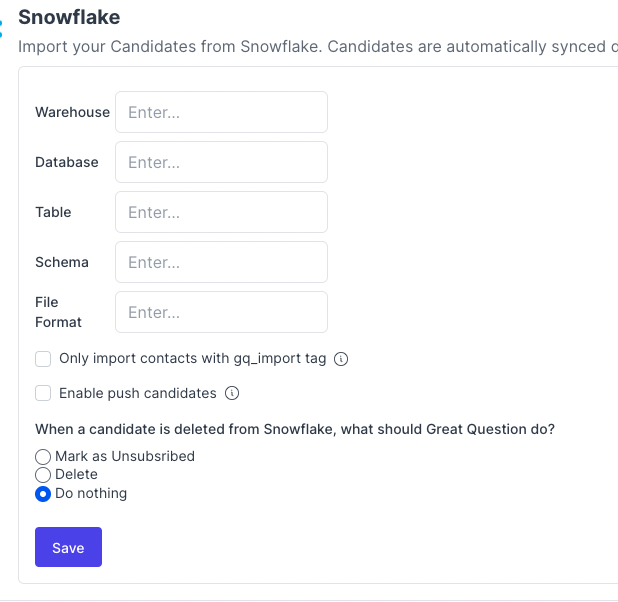
- Once you are connected, you will see the screen below:

Let's break this screen down:
Warehouse, Database, Table and Schema (required)
- This is where your data lives inside Snowflake. Add the values to tell us where to get the data from.
File Format
- The File Format needs to be created in case you want data exported from Great Question into Snowflake. It is a named file format that describes a set of staged data to access or load into Snowflake tables. You can find more information about it on the official documentation.
Here is an example:
create file format MY_FILE_FORMAT
    type = CSV;
Only import contacts with gq_import tag
- In case you want to restrict access from specific records in the table you chose, you can add a boolean column called
gq_importand the records withfalsewon't be imported into Great Question.
Enable push candidates
- When enabled, this will allow data to be exported from Great Question into Snowflake. It will create a
CANDIDATEStable inside the database you configured previously and add the id and email of all existing candidates. Make sure you have the proper permissions to create the table and insert data to it. It is useful in case you want to restrict which candidates will get synced back to Great Question to only those existing in Great Question already. Note: The Snowflake user connected to GQ needs to have owner privileges to the warehouse.
When a candidate is deleted from Snowflake
- If a previously imported record is removed from Snowflake, the candidate will not be deleted automatically from our Great Question database. This is a limitation of how our integration currently works. However, if you want to automatically delete records from Great Question, you can add a boolean column
is_deletedto Snowflake and select what type of behavior you want when the record is imported to Great Question.
The export will happen daily at 23:30 PST or you can trigger manually using theExport Databutton.
- After clicking Save, you are good to go!
- The candidates will be synced every 24 hours at midnight PST, and you can trigger a sync manually at the candidate's page.

Custom Attributes
All columns from Snowflake will be available in Great Question. If you want to be able to use any specific column, you need to create a candidate attribute for it. In order to do that, you go to Account > Candidate attributes > New attribute (or click here).
Have Questions?
Please reach out to us in the chat or at [email protected]!
