Table of Contents
Screeners Overview
 Updated
by Billy Dowell
Overview
What are screeners?
Screeners are short questionnaires you add to a study to help qualify or disqualify participants before they join. They ensure you execute studies with people who meet your criteria — saving time and improving research quality.
Video Demo
Welcome to your Screener — Navigation
At the top of the Screeners page, you’ll find three key buttons:
- Screener Logic – configure overall preferences, like screener-level qualification and disqualification, and view a roll-up of all logic rules.
- Preview – view your screener as if you were a candidate to confirm flow and logic.
- Library – access saved screener templates and questions you can apply to your study.

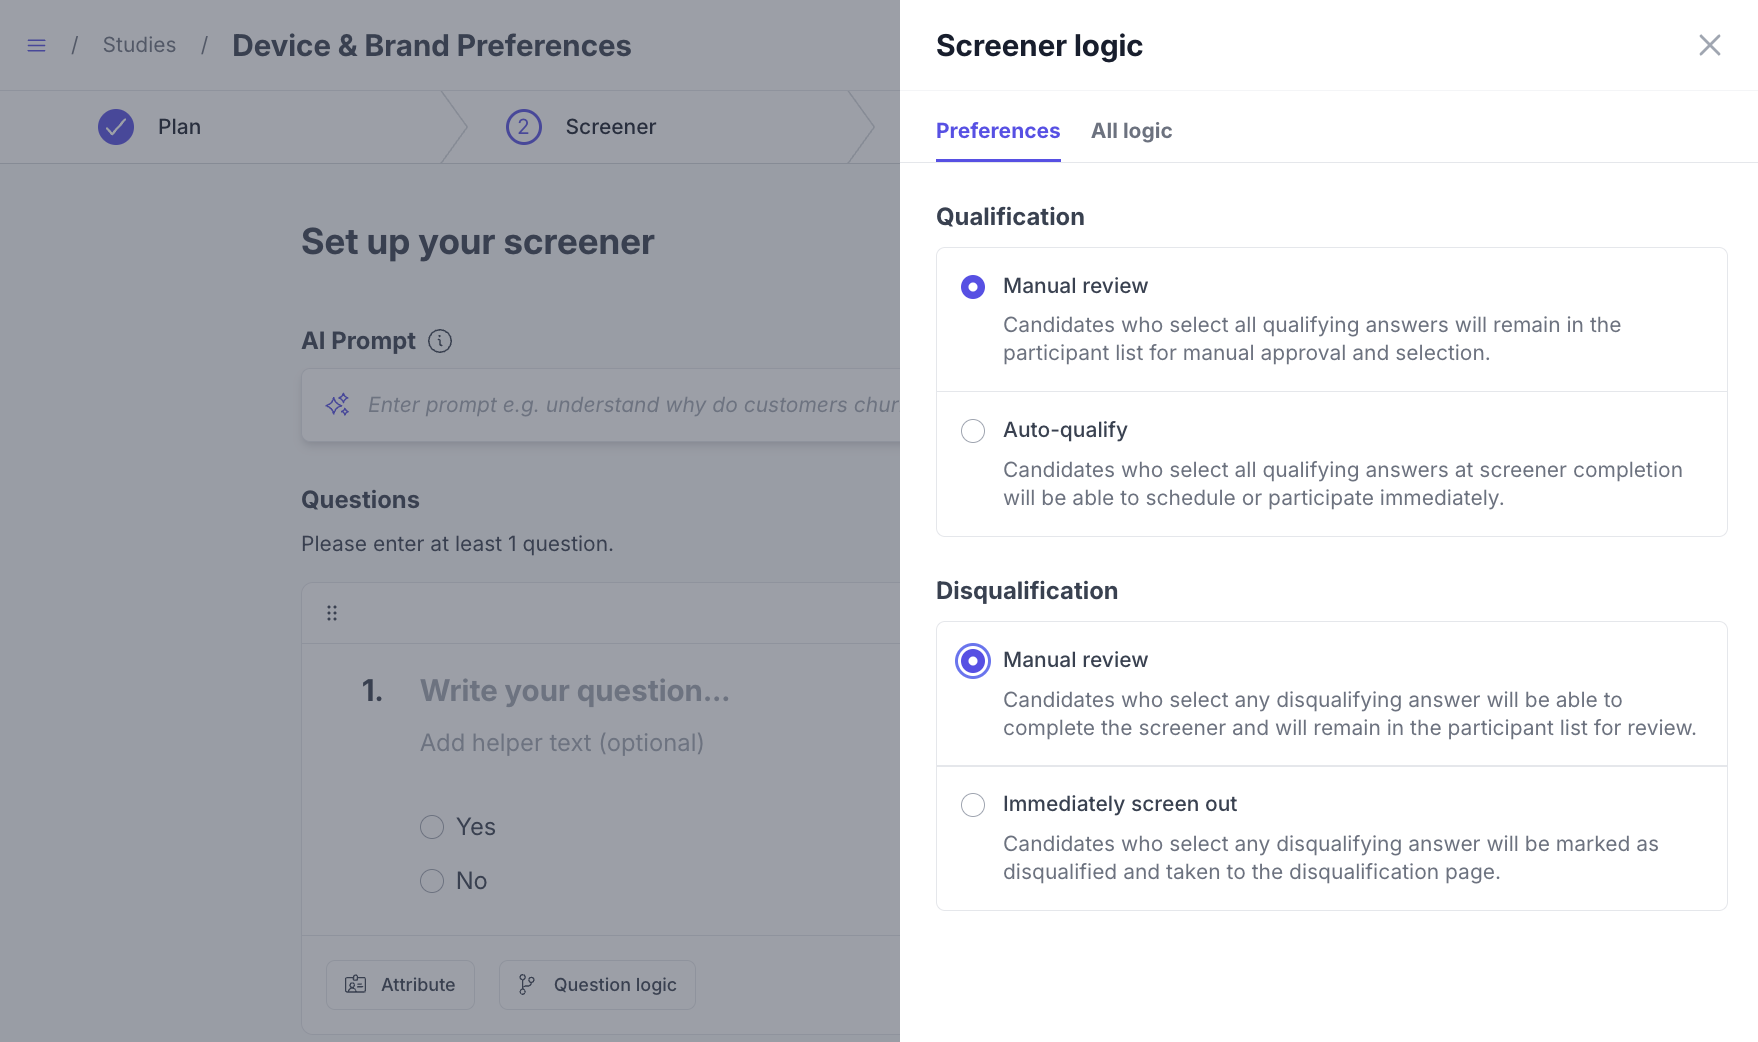
Screener logic — settings
Click Scree logic in the header to configure how your screener behaves.
The panel includes two sub-tabs:
- Preferences: Set rules for automatic or manual qualification/disqualification.
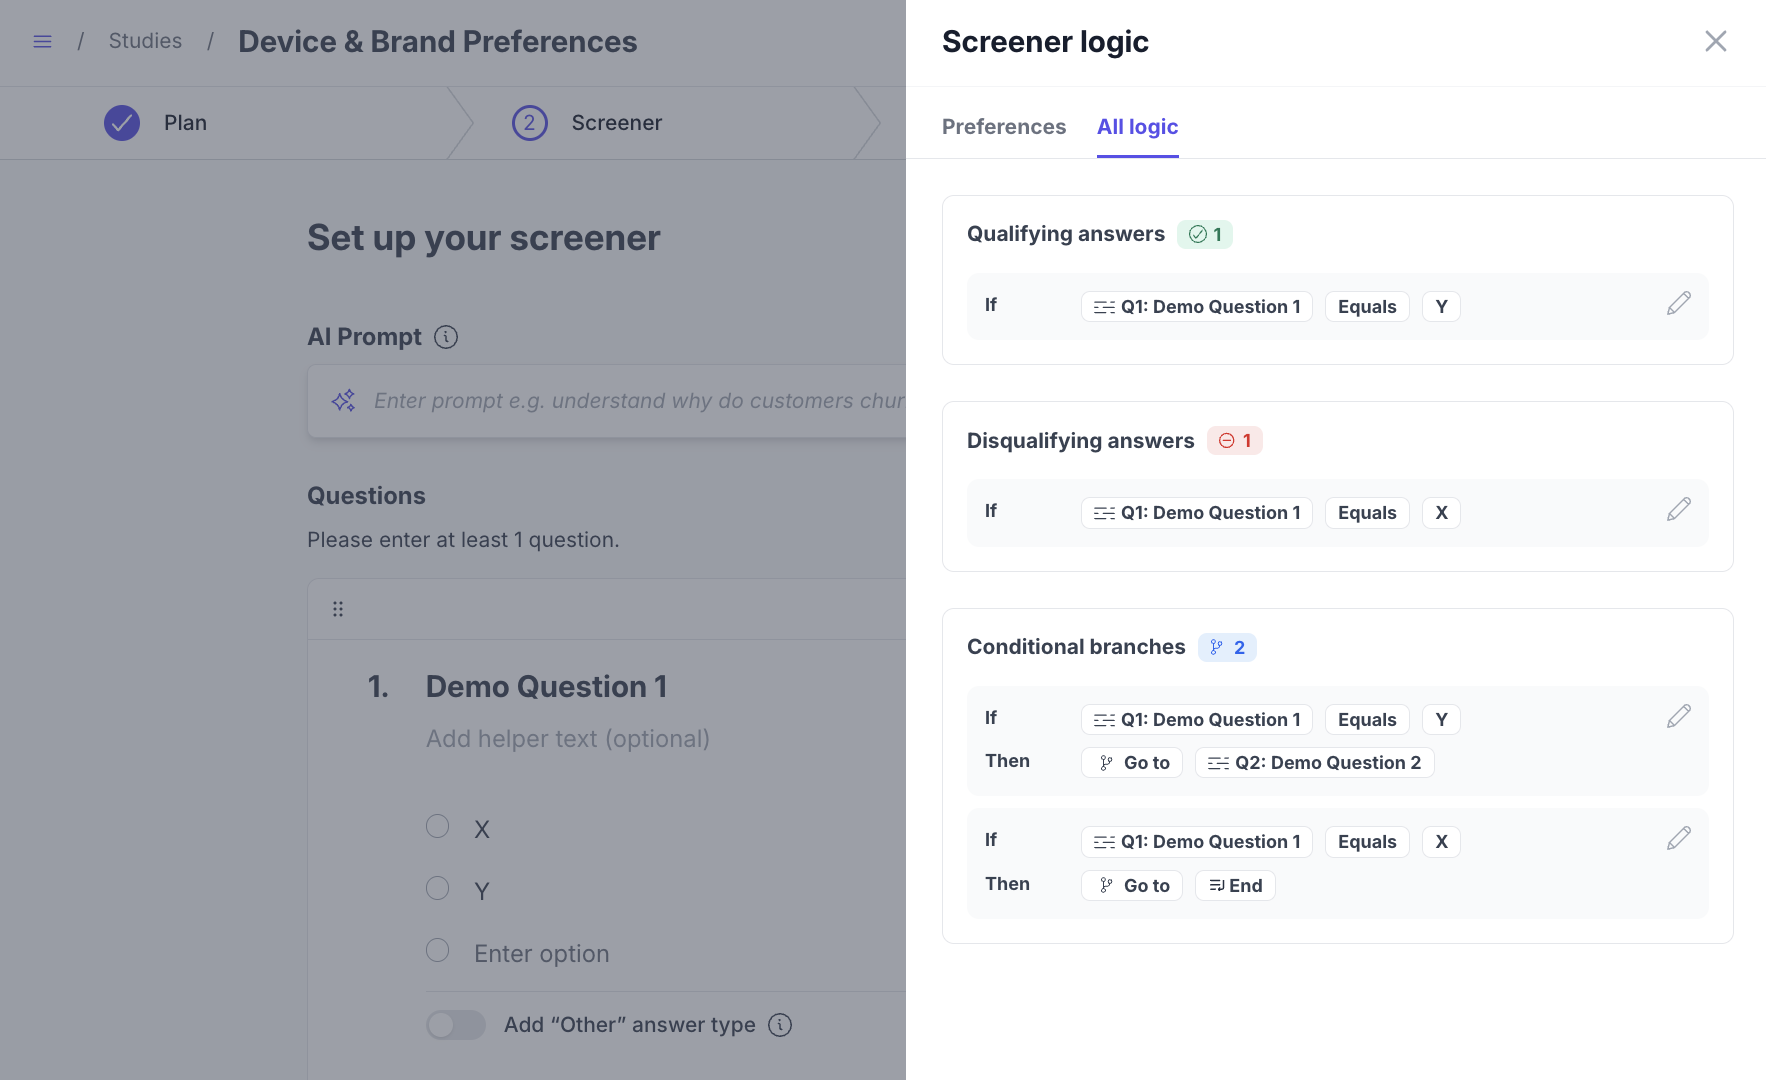
- All Logic: View all qualifying, disqualifying and branch logic for your screener.
Preferences tab

Preferences: Qualification
Choose whether to manually review qualified candidates or automatically invite them to participate.
Manual review
- Candidates appear in the Participant's table under the Applied tab with tags:
- Qualified – all qualifying answers given.
- Partial – some qualifying answers given.
- No data – no qualifying answers provided.
Auto-qualify
- Selection of all qualifying answers results in a candidate being immediately invited to move forward:
- Interview study – can schedule right away.
- Unmoderated study (survey, prototype test, tree test) – start their session immediately.
- All candidates will appears in the Participant table with the tags shared above.
Preferences: Disqualification
Choose whether to manually review disqualified candidates or automatically screen out.
Manual review
- Candidates appear in Participant's table under the Applied tab with the following tags:
- Disqualified – all disqualifying answers given.
- Partial – some disqualifying answers given.
- Shows the count of disqualifying answers given vs. total in the screener.
Immediately screen out
- Selection of any disqualifying answer immediately routes the candidate to a disqualification page at the end of the screener.
- This page’s content is fully customizable.
- Disqualified candidates are marked as Removed from the study.
All logic tab

View all qualification, disqualification, and branching rules in a single place. In this view:
- Easily review all screener logic in one place.
- Jump to individual question rules to edit and refine.
Choices made here dictates how the screener will process responses once they're submitted.
Logic & Answer Tagging — Question settings (below)
Choices made on the question level enable you to mark specific answers as qualifying or disqualifying. In addition, choices control how candidates are routed through the screener.
Logic & Answer Tagging — Question settings
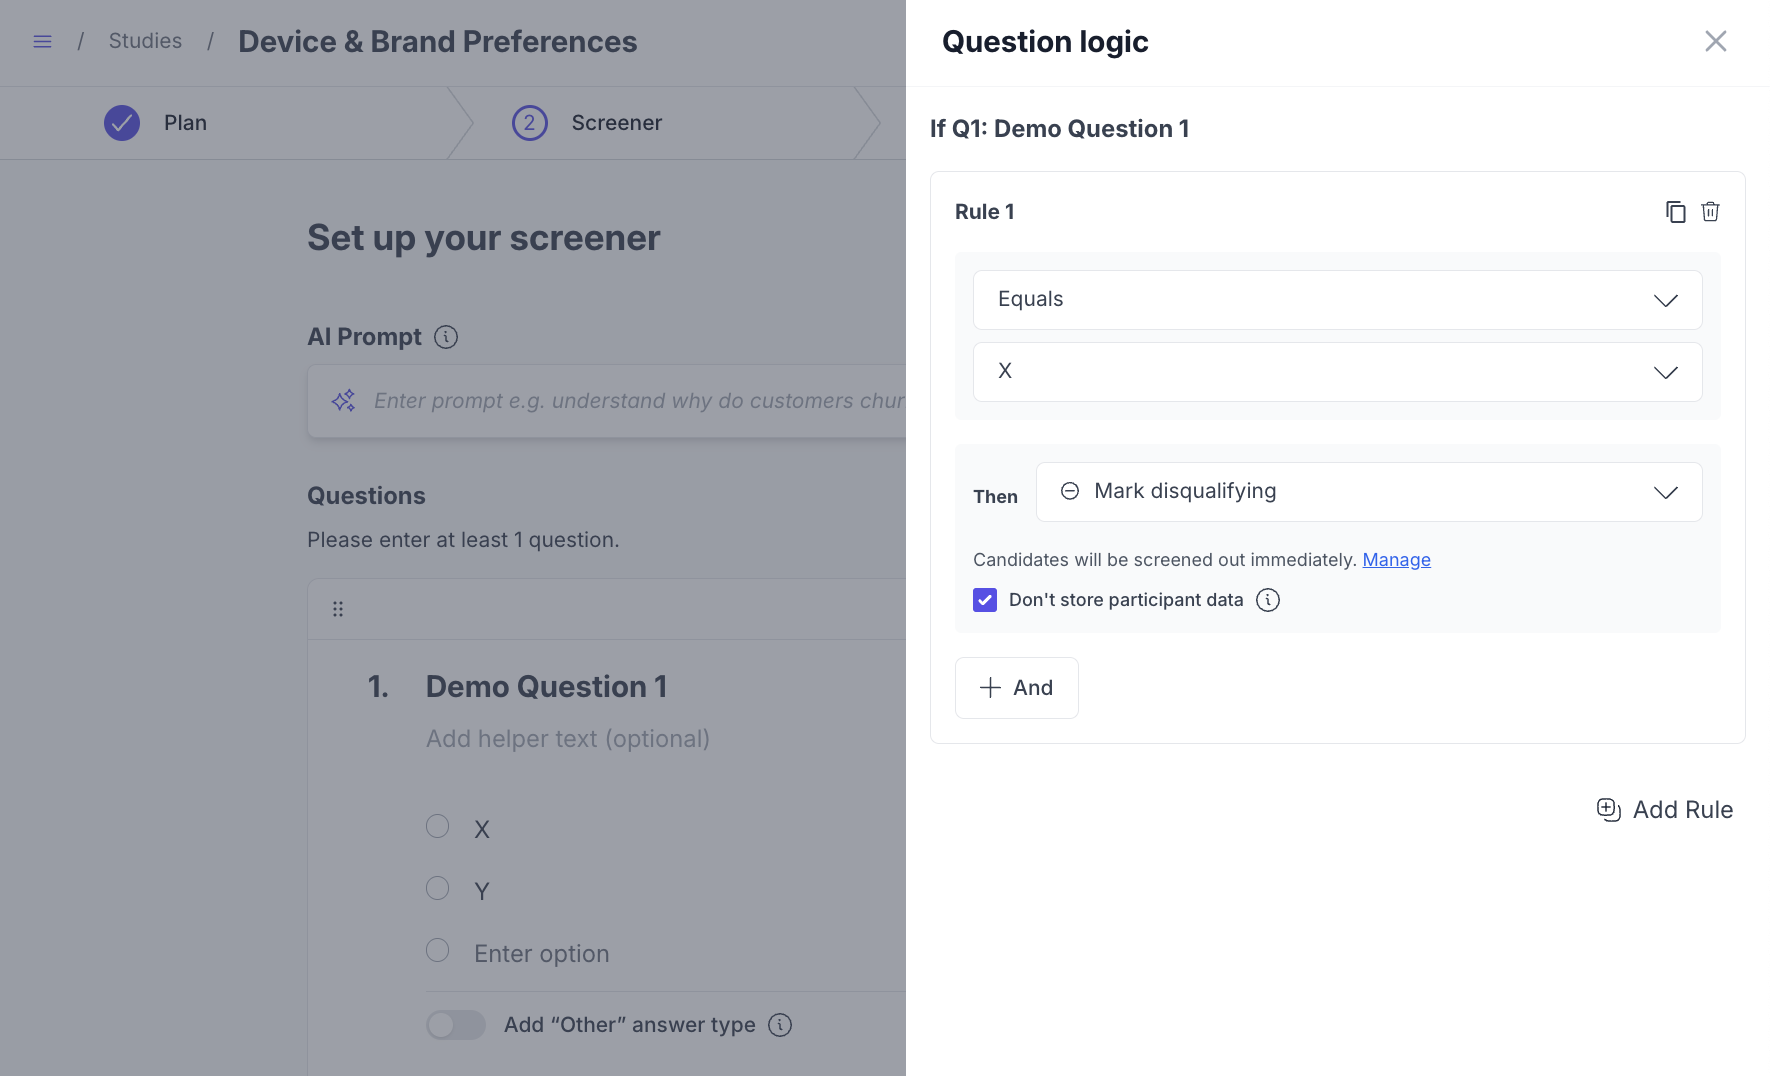
For per-question control, open the Logic & Answer Tagging button on any question card.
From here, you can:
- Mark specific answers as qualifying or disqualifying and/or
- Route candidates to other questions based on their answers.
- Note: You can combine branching and qualification rules in a rule, if you so choose

Example:
- If a candidate selects X, mark the answer as disqualifying. The candidate experience depends on preferences:
- With Immediately screen out set, they’ll see the disqualification message and be marked as Removed with a disqualificaiton tag.
- With manual review set for disqualification, they’ll continue in the screener and marked as Applied with a disqualification tag when they finish.
- If a candidate selects Y, mark the answer as qualifying AND route them to another qualifying question.
Other disqualification settings:
"Don't store participant responses"
- When enabled, this setting will clear partial response data when the candidate submits their screener. This protects you from collecting any data from candidates disqualified from this specific rule.
Frequently Asked Questions
1. What happened to the star icons and the concept of “Ideal Answers”?
We’ve retired this concept and replaced it with qualification rules. Instead of marking answers as “ideal,” you now mark them as qualified at the question level through the Logic & answer tagging menu.
2. What happens to my legacy studies with screeners and my existing active studies with screeners?
We’ve migrated all legacy screeners to the new system. All functionality has been preserved, and active screeners will continue to collect and route candidates as expected.
3. Do I need to update my existing screeners?
No action required. All your existing screeners will function as before. However, if you want to take advantage of new features (like customizable disqualification pages or the All Logic view), you may want to review and update your screener settings.
4. What status will disqualified candidates have in my study?
Immediately screen out disqualification -> candidates are marked as Removed with a disqualification tag. Manual review disqualification -> candidates are marked as Applied with a disqualification tag.
5. What should I know when recruiting external candidates?
- At least two questions must be added to a screener, and at least one question must be marked as qualifying. There are no requirements for disqualification, though the feature can be used.
- Be sure to enable automatic disqualification. With this setting, disqualified candidates will be automatically removed from the study, allowing you to continually recruit potential candidates until your target is met.
