Table of Contents
Great Question Teams

Teams
Organize your workspace around the people and research that belong together.
What Are Teams?
Teams are a group of workspace members who collaborate on research together. Teams let you scope studies, candidates, and repository artifacts so the right people have access to the right research. Whether your organization runs research across independent product lines or needs strict data separation between departments, Teams give you the structure to match how your company actually works.
Why It Matters
Control who sees what. Teams govern visibility and edit access across studies, candidates, and repository artifacts — so each group only works with the research that's relevant to them.
Control who can contact candidates'. Candidate affiliation ensures that Teams only contact and manage the participants relevant to their research.
Manage budgets by Team. Team Wallets let Admins allocate incentive funding per Team, giving each group a dedicated budget for their research.
Apply custom branding per Team. Each Team can have its own participant-facing branding, so studies reflect the right brand identity without manual setup each time.
Common Use Cases
Use Case | How Teams Helps |
Multiple product lines | Each product team gets its own studies, candidates, and repository — no overlap |
Agency managing multiple clients | Private mode keeps each client's data fully separated between Teams |
Centralized research ops | A shared Workspace affiliation lets cross-functional studies remain visible to everyone, while team-specific work stays scoped |
Regulated environments | Private visibility mode and Team-level candidate access enforce strict data boundaries |
Key Concepts
Affiliation
Every study and candidate in Great Question has an affiliation that determines who can view, edit, and interact with it. There are three types:
Affiliation | What It Means |
Team | The resource belongs to a specific Team. Access is governed by Team membership and your workspace's visibility settings |
Workspace | The resource is shared across the entire organization. All workspace members can view it, regardless of Team membership |
No one | The resource is not affiliated with any Team or the Workspace. |
Visibility Modes
Your workspace Admin controls how much Teams can see of each other's work. There are two modes:
Open mode (default & first setting) allows all members to view candidates and studies across the workspace, regardless of Team membership. Edit access is still limited to your own Team's or Workspace resources (for Creators) or all resources (for Admins).
Private mode (second setting) restricts members to only seeing candidates and studies belonging to their own Teams. Resources with Workspace affiliation remain visible to everyone, even in private mode.
User Roles and Teams
What you can do with Teams depends on your workspace role. Here is a summary of key permissions:
Action | Observers | Creators | Admins |
View Team resources | Yes, if visibility allows | Yes, if visibility allows | Always |
Edit Team studies | No | Workspace studies and own Teams only | All Teams |
Create studies | No | Workspace studies and own Teams only | Any Team or Workspace |
Shortlist and contact candidates | No | Workspace studies and own Teams only | All candidates |
Edit candidate profiles | No | Team-affiliated candidates in own Teams | All candidates |
Manage Team membership | No | No | Yes |
Create or delete Teams | No | No | Yes |
Update candidate affiliation | No | If permitted by Admin | Yes |
Create Workspace studies | No | If permitted by Admin | Yes |
How to Create a Team
Only Admins can create Teams.
- Click the + button next to Your Teams in the sidebar, or go to the Teams page and click Create team.
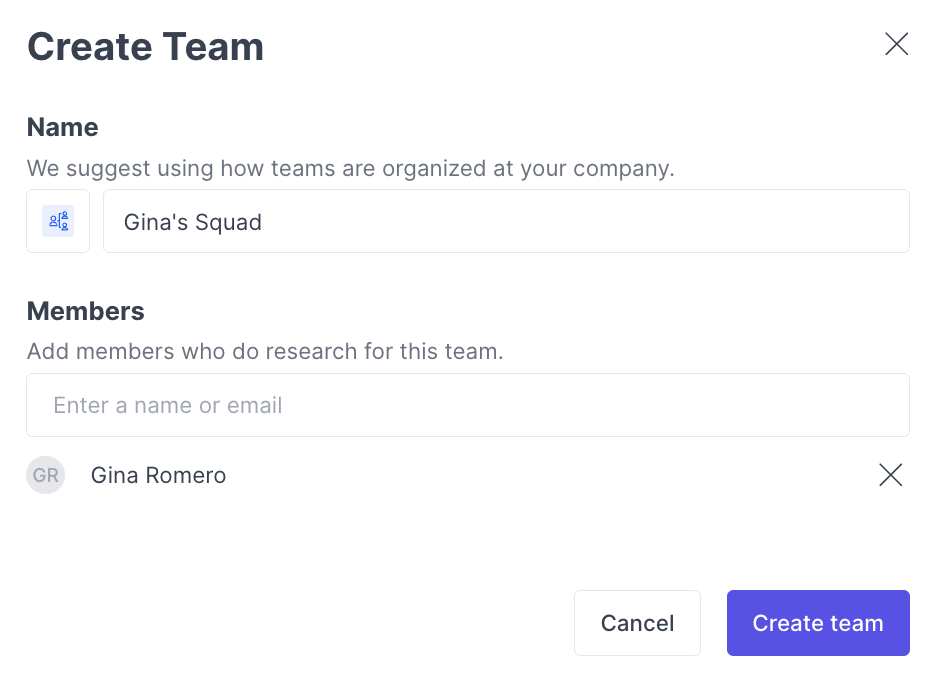
- Enter a name for the Team. Use a name that reflects how teams are organized at your company, such as a product area or department.
- Choose an icon and color to make the Team easy to identify.
- Add members by searching for workspace members by name.
- Click Create.
A Team must have a name. Icon, color, and members are optional and can be updated later.
Adding and Removing Members
Admins can edit a Team's membership at any time:
- Go to the Teams page.
- Open the actions menu on the Team and select Edit Team.
- Use the member search field to add new members, or click the remove button next to a member's name to remove them.
- Click Save.
Members can belong to multiple Teams.
Joining and Leaving Teams
How members join a Team depends on the Join Access setting:
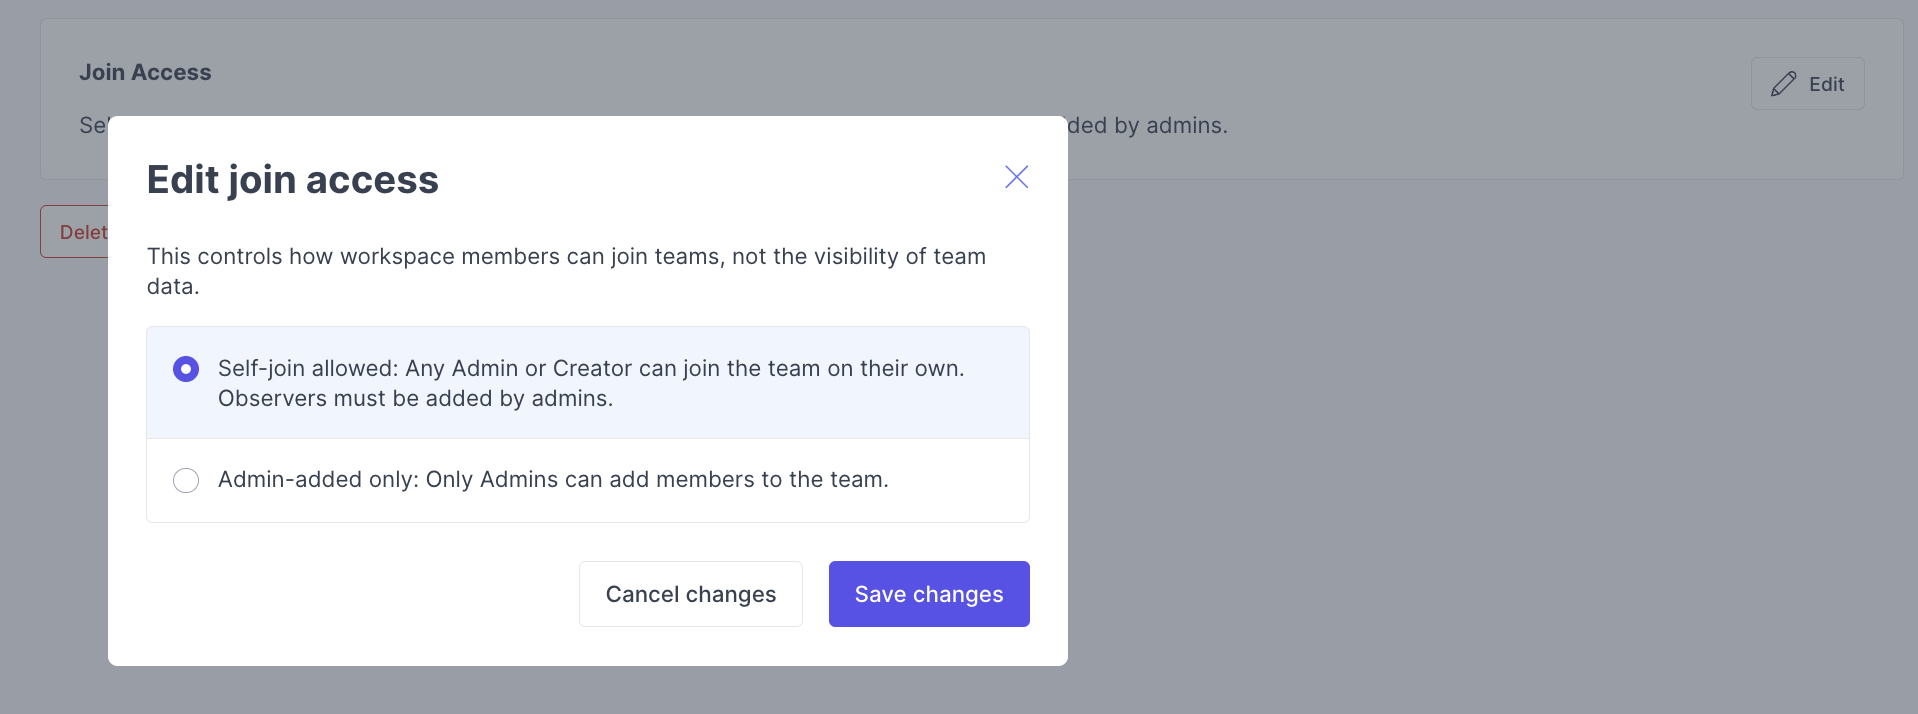
Self-join allowed (default) means any Admin or Creator can join the Team on their own. Observers must be added by an Admin. To join, go to the Teams page, open the actions menu on the Team, and select Join Team. To leave, select Leave Team from the same menu.
Admin-added only means only Admins can add members to the Team.
To change this setting, open the Team's profile page from Settings, find the Join Access section, click Edit, choose your preferred option, and click Save. This setting controls how workspace members join the Team — it does not affect the visibility of Team data.
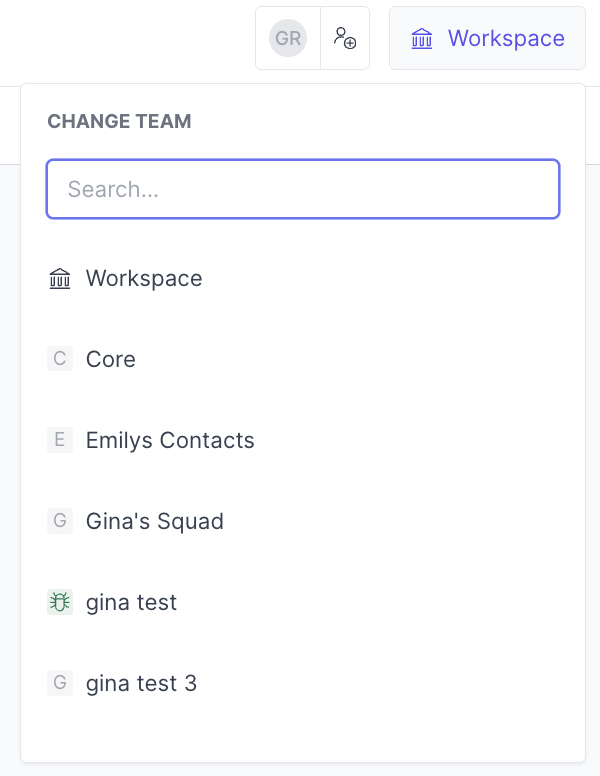
Team Navigation
Once you are a member of a Team, it appears in your sidebar under Your Teams. Expanding a Team gives you quick access to:
- Candidates scoped to the Team
- Studies belonging to the Team
- Repository artifacts for the Team
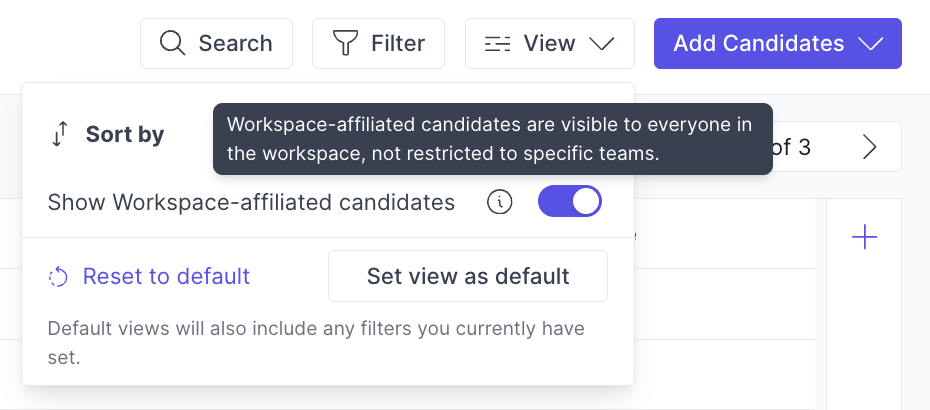
You can also click the search icon next to Your Teams to go to the full Teams management page. You can also view Workspace resources by toggling on “Show Workspace-affiliated candidates”.
Working with Studies
Assigning a Study to a Team
When creating a new study, select a Team from the Team picker. If you have permission to create Workspace studies, you can also choose Workspace to make the study visible to everyone. Studies created by Team members default to their Team automatically (if you are part of multiple teams, it will default to the first team on the list. If you have access to create Workspace studies, when you create a study, it will default to Workspace instead.
To change the affiliation of an existing study, use the Team picker in the study header. Changing a study's affiliation affects access, which candidates can be shortlisted, where artifacts appear in the repository, which wallet funds incentives, what branding participants see, and which consent form is used. A confirmation dialog will explain these changes before the update is applied.
Working with Candidates
Candidate Affiliation
Candidates follow the same affiliation model as studies. Team-affiliated candidates can only be contacted and edited by members of that Team (and Admins). Workspace-affiliated candidates are visible to all members and can be contacted by any Creator with edit access to the relevant study. No-one-affiliated candidates are only visible to Admins. Candidates can be affiliated with multiple Teams.
Assigning Candidates to a Team
- Go to Candidates (global or team-specific view).
- Select candidates using the checkboxes.
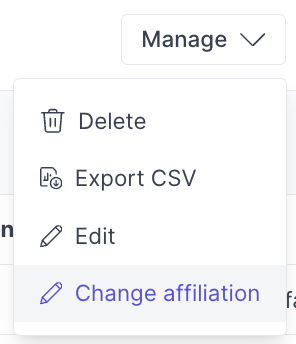
- Click Manage → Change affiliation.
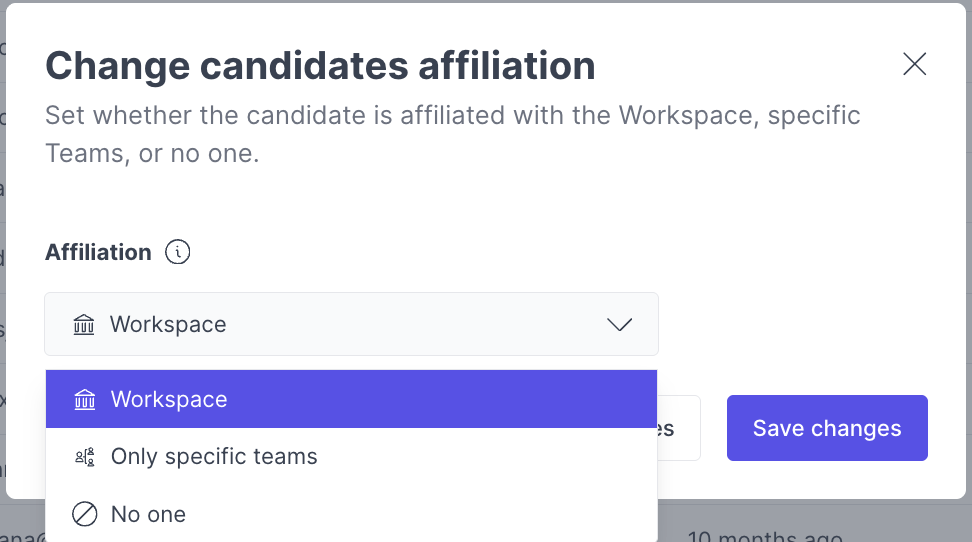
- In the popup, select Only specific teams and check the desired Teams, or choose Workspace to make them globally available.
- Click Save changes.
To filter candidates by Team on the global Candidates page, click Filter, search for Affiliation, and choose the Teams you want to filter by.
Shortlisting Rules
Which candidates can be shortlisted to a study depends on the affiliation of both the candidate and the study:
Candidate Affiliation | Can Be Shortlisted To |
Workspace | Any study |
Team | Studies in the same Team, or Workspace studies (if you are a member of the candidate's Team) |
No one | Cannot be shortlisted |
If you select candidates that cannot be shortlisted or contacted, the platform will tell you which ones are ineligible and why.
Permission Settings (Admins Only)
Admins can fine-tune how permissions work across Teams under Settings → Permissions.
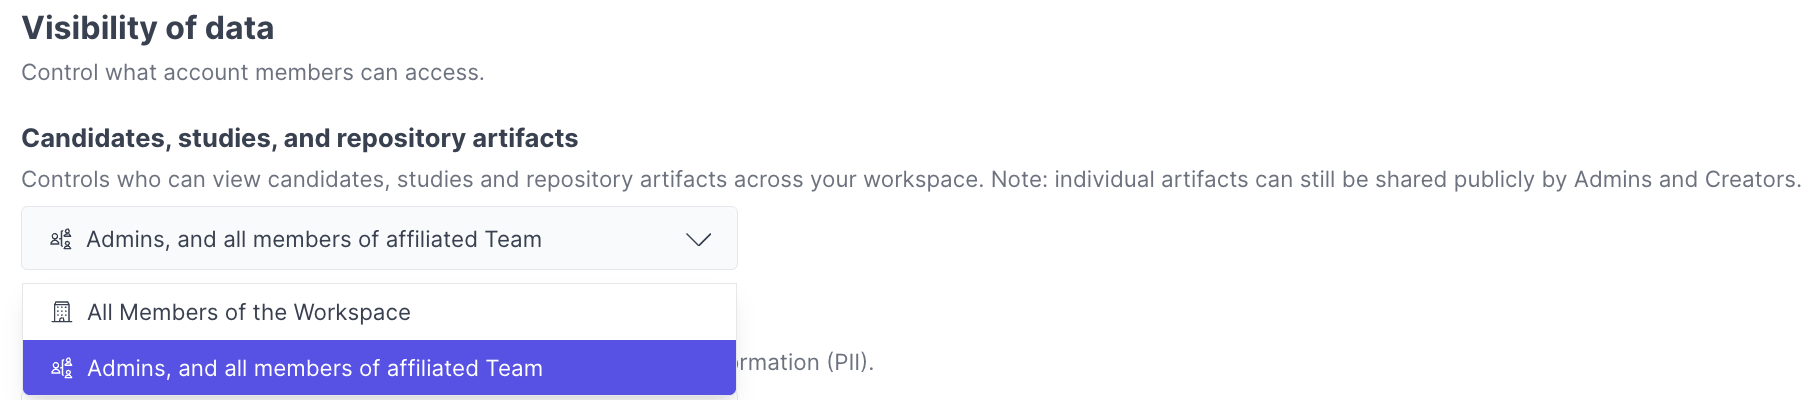
Visibility controls whether Team data is visible to members outside the Team. Set to All members for open mode, or Admins and members of team for private mode.
Manage Workspace Studies controls who can create Workspace-affiliated studies, change a study's affiliation to or from Workspace, and edit Workspace studies. Options are Admins and Creators (default) or Admins only.
Update Candidate Affiliation controls who can change a candidate's Team affiliation. Options are Admins and Creators (for Teams they belong to) or Admins only.
Manage Workspace Affiliation (Candidates) controls who can set candidate affiliation to Workspace. Options are Admins and Creators or Admins only.
Team Profile and Settings
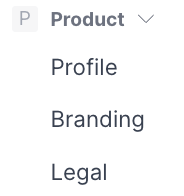
Each Team has a profile page where you can configure:
- Name and Icon — Edit the Team's display name, icon, and color
- Join Access — Control whether members can self-join or must be added by an Admin
- Branding — Set custom branding for participant-facing pages (see the Branding article)
- Legal — Manage Team-specific consent forms (see the Consent Forms article)
To access Team settings, go to Settings in the sidebar and find your Team listed under the Teams section.
Team Wallets
Teams can have their own wallet for managing research incentives. When enabled, each Team gets a dedicated wallet, studies assigned to a Team can only use that Team's wallet, and Workspace studies use the main (general) wallet.
Enabling and Funding Team Wallets
- Go to Settings → Wallets and toggle Team Wallets on. If you do not see this option, contact [email protected].
- Ensure your general wallet has funds.
- Click Move funds.
- Select the source wallet and the destination Team wallet.
- Enter the amount and click Confirm & move.
Each Team wallet shows Available, Allocated, and Spent balances.
Deleting a Team
Only Admins can delete a Team. When a Team is deleted, studies affiliated with the Team are moved to Workspace affiliation, and candidates who were only affiliated with that Team become Workspace-affiliated.
A Team cannot be deleted if it has studies with unspent funds from a Team wallet (close those studies and return funds first) or if it is managed by an Identity Provider (remove it from the IdP configuration first).
To delete a Team, go to the Team's profile page, click Delete Team, review the consequences, and confirm.
Identity Provider (IdP) Integration
If your organization uses SCIM provisioning, Teams can be managed through your Identity Provider. IdP-managed Teams are marked with a badge in the Teams table and profile page. Depending on your sync settings, membership changes for IdP-sourced users may be locked — they cannot be manually added or removed from the Team in Great Question. IdP-managed Teams cannot be deleted from within Great Question and must be removed from your IdP configuration first.
Local users (those not sourced from the IdP) can always be managed manually, even on IdP-managed Teams.
Troubleshooting
Issue | What's Happening | How to Fix |
Cannot create a Team | Only Admins can create or manage Teams | Confirm your role or contact an Admin |
Teams not visible in Settings | Teams is only available on Enterprise plans | Contact [email protected] to enable it |
Cannot move a study to a different Team | The study may have unspent funds from a Team wallet, or you may not be a member of the target Team | Close the study and return funds, or ask an Admin to move it |
"You must be on at least 1 team" when creating a study | Your workspace has Team access control enabled and you are not a member of any Team | Go to the Teams page and join or create a Team |
Selected candidates cannot be shortlisted | The candidate's affiliation does not match the study's Team | Verify that you are a member of the candidate's affiliated Team and that affiliations are compatible |
Cannot contact a candidate from a Workspace study | Even on Workspace studies, you can only contact candidates affiliated with Teams you belong to (or Workspace-affiliated candidates) | Check the candidate's affiliation and your Team membership |
Candidate affiliation not saving | A possible UI issue, or insufficient permissions | Refresh the page and confirm your Admin has granted you the Update Candidate Affiliation permission |
Funds not transferring between wallets | Team Wallets may not be enabled | Contact [email protected] for assistance |
Still need help? Contact us at [email protected] — we're happy to help!