Table of Contents
AI Synthesis

AI Synthesis
Turn completed studies into structured findings automatically — with AI-generated summaries, themed insights, and highlight reels.
What is AI Synthesis?
AI Synthesis in Great Question is where you go to understand what a study revealed. When a study reaches three or more completed interviews, the AI Synthesis tab automatically generates a structured summary of your findings — including an overview, key insights, and major themes with supporting quotes. No manual tagging or organizing required.
For teams that prefer a hands-on approach, the legacy Highlights board remains available as a sub-tab, giving you the same drag-and-drop workspace for manually grouping highlights into themes.
Why It Matters
Get to insights faster. AI Synthesis eliminates the manual work of reviewing every session and organizing highlights. Once your study crosses the three-session threshold, a structured summary is ready and waiting.
Trust the output. Every theme includes inline citation badges that link directly to verbatim participant quotes. Hover over a badge to see the quote; click it to jump to that exact moment in the transcript.
Share findings without extra effort. PMs, designers, and stakeholders who run or consume research can open the Synthesis tab and immediately understand what a study found — no researcher bottleneck required.
Watch the highlights. An auto-generated highlight reel stitches together the key quotes from your session recordings into a single video compilation, complete with chapter cards for scrubbing to individual moments.
Where to Find AI Synthesis
You can access Synthesis in any published Customer Interview study that has three or more completed interviews with transcripts:
- Open your study.
- Click AI Synthesis in the left-side menu under Results.
AI Synthesis
The AI Synthesis tab is the default view when you open Synthesis. It displays three main sections: an overview, major themes, and key insights. An auto-generated highlight reel is also included when session recordings are available.
Overview
The overview provides a concise summary of what the study explored and what emerged from the interviews. It includes the number of interviews completed and a high-level description of the study's findings.

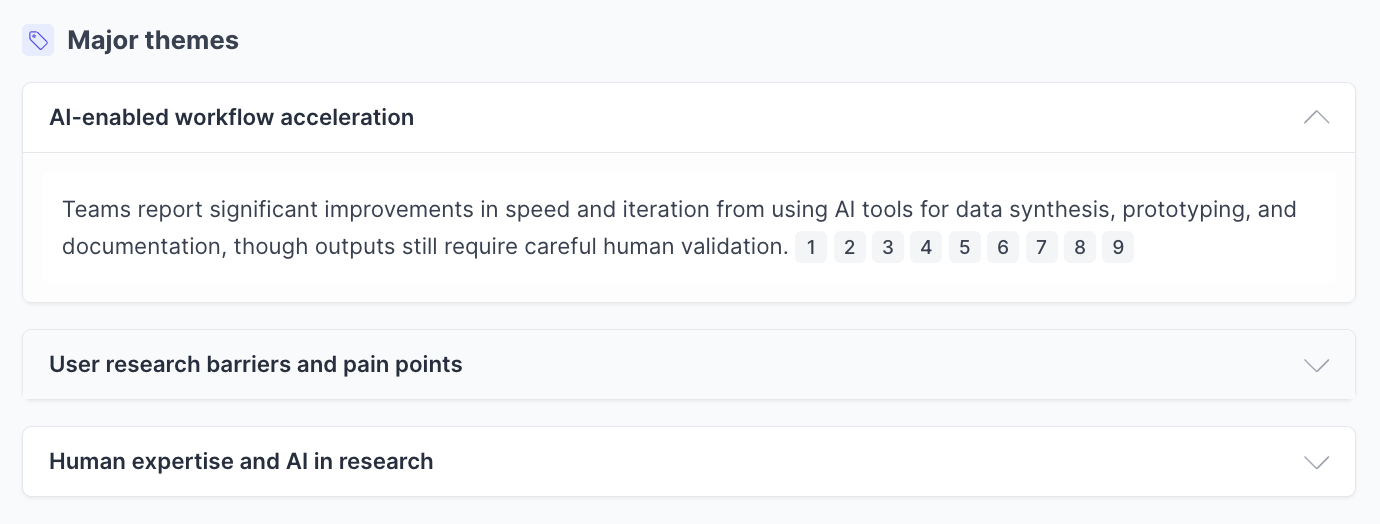
Major Themes
Themes are the core patterns that emerged across your interviews. Each theme is displayed as an expandable section with sub-items that include inline citation badges. These badges represent the number of supporting quotes behind each sub-item.
Hovering over a citation badge reveals the verbatim participant quote. Clicking the badge takes you to the corresponding moment in the session transcript, so you can verify the finding in its full context.
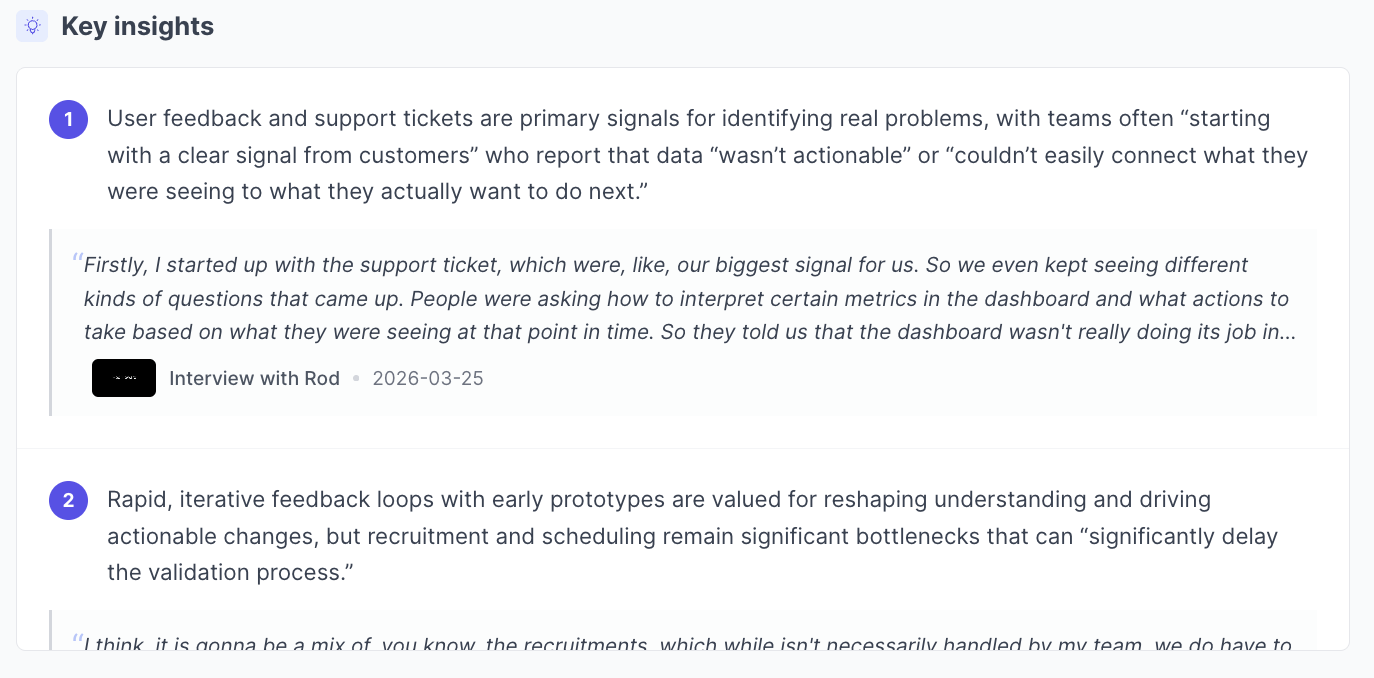
Key Insights
Key insights are the most significant takeaways from the study, numbered and ordered by importance. Each insight includes a supporting quote from a specific interview, attributed to the participant with the interview date.
Highlight Reel
When session recordings are available, Synthesis automatically generates a highlight reel — a video compilation of the key quotes stitched together from across your sessions. The reel includes chapter cards so you can scrub directly to individual quotes. The reel duration and number of supporting quotes are displayed below the video.

Highlights (Legacy Board)
The original manual synthesis workspace is still accessible via the Highlights sub-tab within Synthesis. This board lets you organize highlights into themed groups using drag-and-drop.
AI Synthesis vs. Highlights: Which Should I Use?
AI Synthesis is fully automatic. Once a study reaches three or more completed interviews, it generates a structured summary, themed insights, and a highlight reel without any manual effort. It is designed for speed: you open it and the findings are already there. This makes it ideal for PMs, designers, and stakeholders who need to understand what a study revealed quickly, or for researchers who want a starting point before diving deeper. AI Synthesis is read-only — you cannot edit or rearrange the themes it produces.
Highlights is a manual workspace. You create your own groups, drag and drop highlights between them, name your themes, and organize the evidence the way you see fit. This gives you full control over how findings are structured and is better suited for researchers doing deep qualitative analysis, building custom frameworks, or preparing findings for a specific audience. Because you are doing the organizing yourself, it takes more time but gives you more precision.
How to Use the Highlights Board
If you already know your themes:
- Click the + button to create a new group.
- Give your group a name.
- Optionally, click the ... menu to change the group's color or add a description.
- Drag and drop highlights from Ungrouped into your new groups.
- Select highlights using checkboxes or ... → Select all.
- Add grouped highlights to a Reel, an Insight, or your clipboard.
If you are still exploring your themes:
- Review your Ungrouped highlights.
- Find highlights with something in common.
- Drag and drop them into the outlined box labeled Drag & drop highlights to create a new group, or click the + button and name your group as patterns emerge.
Highlights Board Features
Copy Highlights. Select one or more highlights and click Copy highlights. Pasting into tools like FigJam or Google Sheets preserves table formatting, which is useful for hybrid workflows.
Re-group by. Click Re-group by to automatically organize highlights by Participant or Tag. This is helpful when you are not sure where to start or want to see data grouped by a specific attribute.
Sort by. Use Sort by to reorder highlights based on attributes like time, participant, or tag. Sorting affects highlight order within groups but does not change group order.
Troubleshooting
Issue | What's Happening | How to Fix |
Synthesis tab not visible | The study is not published yet or does not contain any highlights. | Ensure your study is published and at least one highlight exists before opening Synthesis. |
AI Synthesis shows a pending or empty state | The study has fewer than three completed interviews with transcripts, or the summary is still generating. | Wait until at least three interviews are completed and transcribed. If the study qualifies, the summary may still be processing — check back shortly. |
Themes do not appear in AI Synthesis | The AI summary has not yet generated structured theme data. | Try refreshing the page. If themes still do not appear, the study may need additional sessions for the AI to identify patterns. |
Highlights not appearing under Ungrouped on the Highlights board | No highlights are linked to the study, or filters are applied. | Check that highlights were created within this study. Clear all filters and refresh the page. |
Cannot drag and drop highlights into groups | Browser rendering lag or the page has not fully loaded. | Refresh the Synthesis page. If the issue persists, try zooming out to 90% or using another supported browser. |
Lost manually created groups after re-grouping | Using Re-group by replaces existing manual groupings. | Only use Re-group by when you are ready to reset your structure. Copy highlights first or duplicate the study before regrouping. |
Copy highlights not working | Browser clipboard permissions are restricted. | Allow clipboard access for Great Question in your browser settings, or use keyboard shortcuts (Ctrl/Cmd + C) after selecting highlights. |
Slow performance or lag when dragging highlights | Too many highlights are loaded at once. | Collapse unused groups or use search to filter before reorganizing. Splitting large studies into smaller syntheses can also help. |
Still need help? Contact us at [email protected] — we're happy to help!