Table of Contents
Prototype Testing

Prototype Testing
Learn how to test and validate design prototypes with real users before development.
What Is Prototype Testing?
Prototype testing is a type of unmoderated usability study where participants interact with a design prototype — such as a Figma file or clickable mockup — to complete tasks and share feedback, all without a live moderator.
Instead of watching users in real time, you’ll gather recordings, screen captures, and behavioral metrics as participants move through your prototype on their own time.
Prototype testing helps you understand how real users experience your designs before development, allowing teams to catch usability issues early and iterate faster.
Why It Matters
Prototype testing helps teams validate designs before investing in development. By watching how real users navigate and complete tasks within a clickable design, researchers and designers can uncover usability issues early—long before they become costly to fix. Running these tests asynchronously allows you to collect insights from more participants in less time, without needing to coordinate live sessions. It’s an efficient, scalable way to understand how users experience your product’s layout, content, and interactions, helping you iterate faster and make more confident design decisions.
Common Use Cases
Use Case | Description |
Validate Design Flows | Test new or updated designs to ensure users can complete key actions, such as signing up, checking out, or navigating to core features. |
Compare Design Variations | Run A/B-style tests to evaluate which version of a prototype performs better or feels more intuitive. |
Pre-Development Usability Testing | Catch UX issues before developers start coding, reducing the cost and time of post-launch changes. |
Measure Task Success | Quantify how efficiently participants can complete specific flows (e.g., time-on-task, completion rates, misclicks). |
Gather Early Feedback on Concepts | Use open-ended or exploratory tests to understand first impressions of new features, layouts, or information structures. |
Test on Multiple Devices | Assess how designs perform across desktop and mobile to identify layout or responsiveness issues early. |
How to Set Up Prototype Testing
Step 1: Create Your Study
- Navigate to Studies in the left-side menu.
- Click New study and select Prototype Test.
- Configure study details, including:
- Title and research goal
- Participation limit
- Participant segments (optional)
- Time commitment
- External recruitment (optional)
- Incentives (optional)
- Screener questions (optional)
- Consent form
- Custom study attributes
- Automatic slot release settings
- Participant language preferences
- Review your plan, then click Next.
Step 2: Set Up Your Screener (Optional)
- Add multiple-choice, text, or scale questions using the screener editor.
- Apply logic under Preferences or view full rules under All Logic.
- Review and click Next.
Step 3: Configure External Recruitment (Optional)
If using User Interviews for sourcing:
- Enter participant count, request title, description, and recruitment criteria.
- Review and click Next.
Step 4: Build Your Test Flow
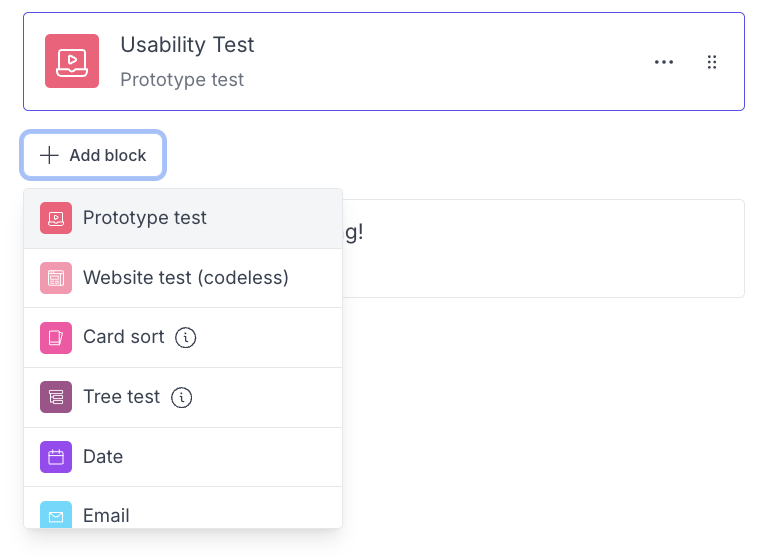
Unmoderated tests are created using blocks — each representing a step in the participant’s experience.
Block | Purpose |
Welcome | Introduce the study and explain expectations. Add a title and description. |
Permissions | Ask participants to grant permissions for screen, mic, and camera recording. |
Prototype Test | Embed a Figma prototype for usability evaluation. |
Other Questions | Add survey-style follow-ups like multiple choice, scales, text responses, and more |
Thank You | Provide closing instructions or next steps for participants. |
Permissions Setup
When adding/editing the Permissions block:
- Choose which inputs to capture: Screen, Microphone, Camera.
- Specify Device Type (Desktop or Mobile).
- Select a Layout Style (Instructions at bottom-left or top).
- Enable “Thinking out loud” reminders to prompt engagement.
- Restrict recording to current browser tab for privacy.
Prototype Testing Block
Use this block to test clickable prototypes and observe user behavior.
Add a Prototype Test Block
In your study setup, select the Prototype Test block.
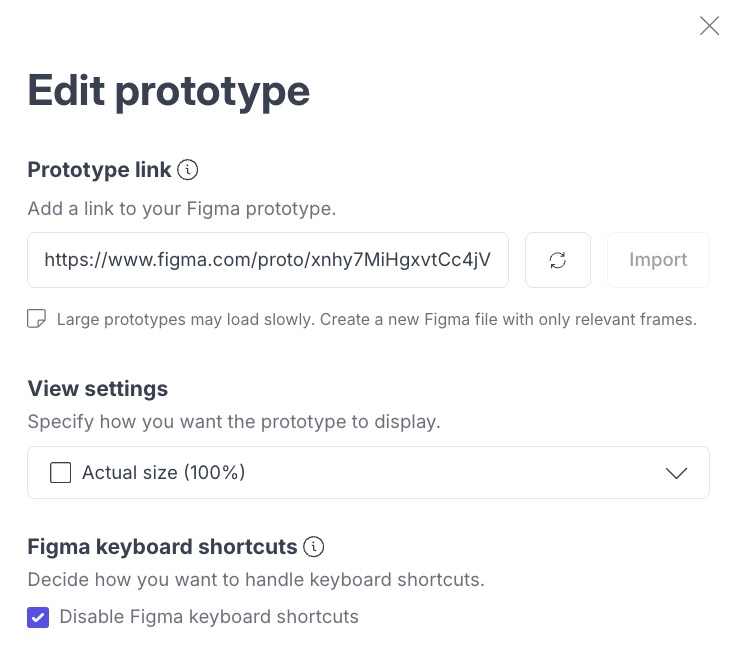
Embed your Figma prototype directly.
- When adding your prototype link, ensure the Share settings are set to Anyone.
Specify the view settings.
- Actual size 100%
- Fit width and height
- Fit width
- Fill screen
- Choose whether to enable keyboard shortcuts.
- Select Goal-based or Open-ended modes:
Mode | Description |
Goal-based | Track participant success in reaching a defined screen. Includes metrics like completion rate, time-on-task, and misclicks. |
Open-ended | Allow free exploration to observe natural behavior and navigation. Ideal for discovery tests. |
Start and goal screens are only visible to you in setup — participants will see the full test flow once published.
Step 5: Review and Publish
Check all sections for accuracy. When ready, click Create to publish your study.
Managing Your Study After Publishing
Once your Prototype Test is live, there are several areas you may want to configure or monitor before and after inviting participants. These actions fall into three categories: Setup, Execution, and Results.
Setup
These areas help you fine‑tune your study before inviting participants.
Plan
Return to the Plan step anytime to adjust details such as participant limits, incentives, study attributes, or segments.
Test
You can view your test and make any adjustments necessary.
Incentives (if applicable)
Manage incentive settings and make any adjustments necessary.
Screener
You can edit screener questions or update logic if your qualification criteria change.
Emails
Customize participant-facing communications—including screener invitations, study invites, task reminders, and completion emails.
Pages
Update the Landing Page and Screener Disqualification Page to ensure participants receive the correct instructions and messaging.
Automations (Unmoderated Studies Only)
Enable automatic reminders to streamline participation:
- Send invitation reminders to candidates who have not responded within 24 hours.
- Send task reminders to participants who have not completed the test after 24 hours.
Notifications
Choose which email alerts you want to receive related to this study.
Execution
Once the study is live, these sections help you manage participants and monitor activity.
Participants
Add candidates, track their progress, and take actions such as inviting, removing, or reviewing participant status. This is where most post-publish activity takes place.
Recruitment Requests (if applicable)
Manage recruit requests and make any adjustments necessary.
Stats
View email performance metrics such as delivery, opens, and clicks.
Screener Responses (if applicable)
Review individual or aggregate responses to your screener questions to determine eligibility.
Results
Use these areas for analysis and reporting.
Tags
Organize your study and global tags and assign grouping if applicable.
Synthesis
Group your highlights to identify themes.
Repository
View the artifacts related to this specific study.
Summary
The Summary view gives you both a high-level and participant-level view of your Prototype Test results, making it easy to evaluate overall navigation performance and spot problem areas quickly.
What you can see
When viewing overall results, you’ll find key metrics including:
- Success rate (if goal screen was indicated) — The percentage of participants who reached the goal screen.
- Average clicks to goal (if goal screen was indicated) — Average amount of clicks it took to reach the goal screen.
- Number of clicks — The total number of clicks participants made when completing the test.
- Misclick rate — The number of clicks outside click hotspots.
- Average duration — The average time it took participants to reach the goal screen.
Exporting results
- Use the Export CSV button at the top of the Summary to download a CSV that includes the participant's name, email and their answers.
- Use the Export CSV button in the results table to download a CSV of the results.
How to Troubleshoot Prototype Testing
Issue | What's Happening | How to Fix It |
Prototype doesn’t load for participants | The prototype link (e.g., Figma) is set to private or requires login. | Double-check your prototype’s sharing permissions — set to Anyone before publishing the study. |
Hitting Figma rate limits | Rate limit has been reached in Figma | Rate limits are determined by the plan you are on in Figma. Confirm that you are connected to the right account in Figma and Great Question and that Figma account has a full license. |
Prototype loads, but interactions don’t work | The prototype file wasn’t published correctly or interactions are missing. | Open the prototype in your design tool and verify that all clickable areas and navigation paths are linked correctly. |
Prototype is cut off or zoomed incorrectly | The view settings were not optimized during setup. | Adjust View settings (Fit to screen or 100%) in your prototype link before adding it to Great Question. Always preview before publishing. |
Participants can’t start the test | Permissions (microphone/camera/screen) weren’t granted. | Ask participants to refresh the page and enable permissions when prompted. Include a reminder in your Permissions block description. |
No audio recorded | Participant microphone not detected or permissions denied. | Instruct participants to check browser permissions for microphone access. For best results, recommend Chrome on desktop. |
No screen recording captured | The participant’s device or browser blocked screen sharing. | Ensure participants are using a desktop browser (mobile devices do not support full screen recording). Remind them to select the correct tab when prompted. |
Participants get stuck on a blank screen | Prototype URL includes an internal Figma link or invalid frame reference. | Re-copy the Share link from Figma’s prototype view (not the design editor). Ensure it links to a published and accessible frame. |
Completion data missing in repository | Participants exited early or didn’t reach the goal screen in a goal-based test. | Verify the test block is set to Goal-based with a defined end screen. For open-ended tests, completion must be manually confirmed. |
Incorrect metrics showing (e.g., success rate, misclicks) | Incorrect goal screen or multiple end screens selected. | Revisit your Prototype test block → confirm only one goal screen is defined. Preview to verify before launching. |
Participants report lag or long load times | The prototype is large or includes heavy image/video assets. | Optimize your prototype before uploading (remove unnecessary layers, flatten images). Use a smaller section of the design if possible. |
Still need help?
Reach out to us anytime in the app or email us at [email protected]!